Bixler ARF (Hobbyking UK warehouse) mini review
Hi there fellow sad gits

Here's the latest and what will be for some time, the final addition to the hangar..
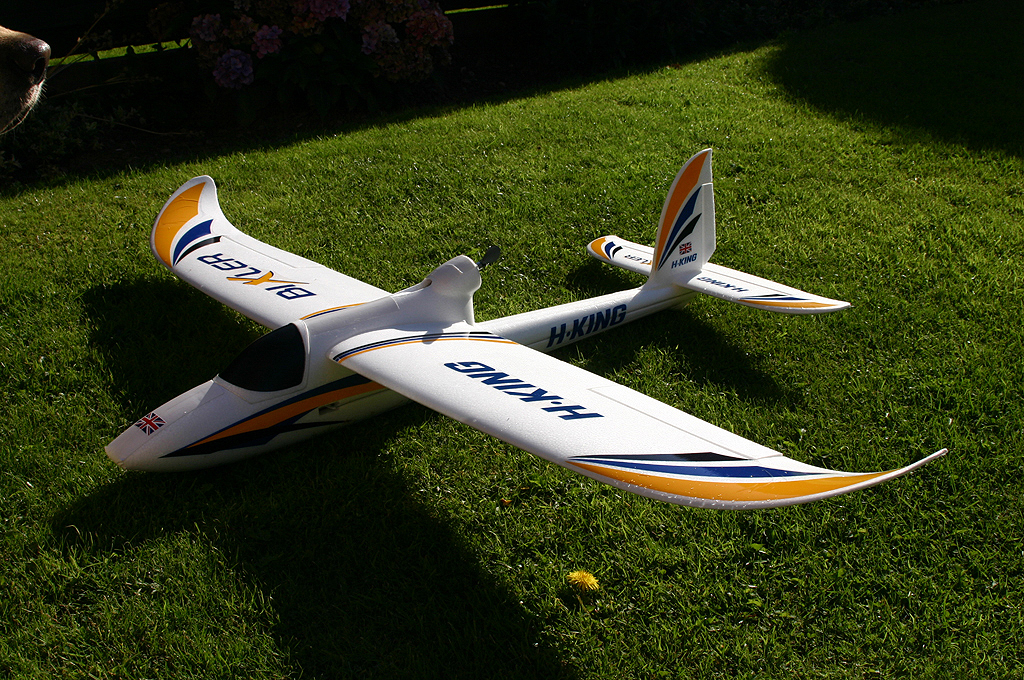
This is the Bixler ARF model from HobbyKing's UK warehouse (not including the Labradors nose.. she wouldn't sod off!). This isn't the only version available.. it comes in PNF and RTF flavours too though not from the UK warehouse. Us paeons are relegated to ARF!
What you get in the box..
The model with servos and motor installed, decals already applied, a CF rod for the wings, horizontal stab, fin and a little bag of bits which include velcro (nice touch).. the prop, control horns and control wire connectors. What you don't get is as you'd expect for ARF.. no battery, no radio gear and no ESC in this case.
The fuse comes in two halves which had me wondering how the hell I was going to glue it. I normally use epoxy which is a bugger to mix and would probably have gone off before I'd added it to one of the two fuse sides! Fortunately, that nice glue kit I got from Wheelspin included something called Foam2Foam. I've not used it before but it's a 'one shot' glue (no mixing) which can be 'moved' for some time before it sets (though still not long) and takes 1-2hours to go off. That seemed to fit the ticket so I used it and it appears to have worked fine. I further secured the fuse halves with clear tape (making sure no glue was proud of the join) and when dry.. added a further strip of white duct tape to ensure strength and protect the under fuse.
One thing I read online was that the control surfaces need to be 'exercised' before use and that was a good tip. The rudder was fine but the elevator and ailerons were almost solid!

As mentioned, the fuse comes in 2 halves which is something I'd not expected but the reason for it is obvious given that this is an ARF model. The 3 motor wires (which came with 3.5mm male plugs) only
just protrude into the fuse and as you have to add your own ESC, it would have been impossible to attach the two had the fuse been ready glued. BTW.. HK recommend a 20amp ESC w/BEC for the Bixler but on Dale's advice.. I went for a 30A from GiantShark for a little over £12. It's programmable but all I've had to do with the Bixler is reset the throttle setting.. easy. Pwr the model up with the throttle at it's lowest setting.. open the throttle to it's max position then pwr off. I was worried about having to program the ESC but it's defaults are fine for fixed wing

It all went together pretty well and everything lines up. The aileron control rods have an adjustable clevis at the end but no tiny elastic bands to keep the clevis shut. Will do something about this if I can get my hands on some of those lazzy bands

I don't care much for the control rod - control horn fixings. They're those horrible little bullet things which reminds me.. I need to get some 'locknut' adhesive for piece of mind.
With the ESC connected and the fuse glued.. there's fair space in the cockpit. The model comes with 6 metal washers glued into one side of the fuse nose and many writers recommend taking them out. I chose to leave them in situ as I'm using the lowest rated battery for the Bixler.. 1300mAh 3S 15C/20C depending on which one of the two I use. As standard, the battery needs to go deep into the nose to get the CoG right (60mm from the LE) but for users of higher pwr batteries, 2200mAh for example, then it may be prudent to remove the washers.
Oh.. before I go further, if you get one.. don't bother reading the colour 'Assembly Manual'. It's in chinese/english and as far as content goes, it's as much use as an ashtray on a motorbike. You DO get one though and it's in colour which is 100% more than I got with the HK ASW28!
What next.. well.. how does it fly?
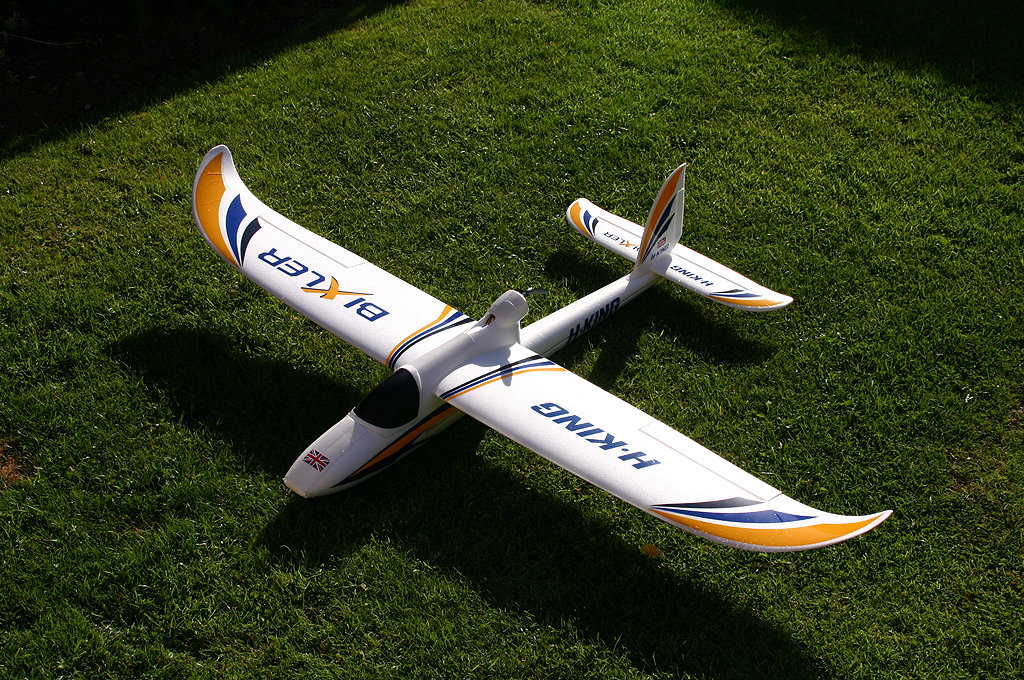
I'd just got back from my first two flights in those shots above and as you can see, nothing is broken and no dinks.. a first!
This says much from the models docile nature. Everyone who's ever lobbed a model into the air for it's maiden will be nervous as every model is an unknown quantity. All you can do is use all your experience and be prepared as you can be. BNF/PNP/RTF models from the likes of Parkzone/Hobbyzone don't suffer the same sort of worry though you still have to be careful. With these, everything is ready balanced.. the CoG is bang on in standard form so all you have to worry about is making sure the control surfaces are where they should be then bang the throttle open. With cheaper models or those you have to put together.. CoG is of great importance and I'm glad I checked the Bixler before flying it. It would have been very tail heavy had I not!
An old battery installed for the first flight and my timer set for 9mins30. The 'manual' gives a flight duration of between 15 and 30mins as standard but this battery had already been used and I wanted to cover my back!
Control surfaces checked.. timer started.. throttle opened to around 90+% and off she went.. nice and straight

Before I knew it, the Bixler was as high as I'd ever taken the ASW (as high as I'd ever been able to get it!) and that on, by then, a reduced throttle. A cautious couple of ccts to get the feel of it and nothing untoward found at all. It may have been ever so slightly tail heavy (despite my checks) but not by a great deal.
It soars like a dream.. much better than the ASW and I knew in short order that 9mins was going to be easy-peasy despite the battery having some life out of it before takeoff. I didn't bother trying to re-trim.. it didn't seem to need it but descents need to be thought out as even with throttle off.. the Bixlers wings generate so much lift, it's happy to stay up
Tried a couple of fast runs and the little tinker goes like a good'un. Top end is tested (as standard) at some 69mph although I didn't take it quite that fast.
Off went the beeper so I took it downwind. As mentioned above.. it took a couple of runs to get it low enough to where I wanted it to be.. it just likes to fly.. but I got it there for a nice controlled landing. Windspeed at ground level going between 0 and 5mph.
Flight 2.
Out with the old battery and in with the new one. This time, I shoved it slightly further fwd. Control checks done.. motor checked.. timer set for 15m30s and off she went.. again, straight and level. I spent the next 15mins pretty much as I'd done the first 9.. putting the model into various situations and seeing what's needed to maintain control. I've never had 15mins out of anything before other than the Champ in light winds and I did check a couple of times (while at a good height) to see if the timer was still running
Eventually, the beeps came and I did a couple of ccts to lose alt before bringing it in for another lovely belly landing.
In Summary..
HK models seem to be a bit hit and miss so you have to expect things to be different from the likes of Parkzone/Hobbyzone. The price you pay reflects this though so don't be too disappointed. I've never fitted/programmed a new ESC before neither have I soldered gold bullet connectors or deans connectors or heatshrink both.. something I had to do with this. However, having done this once and found out how easy it is to do, I've a great deal more satisfaction with the 'build' than had I not done so.
The Bixler flies very well indeed.. even with the piddly little prop you get as standard (many recommend changing this from the outset). It doesn't feel like there's enough wash coming off the prop but there is and then some. The model goes like something off a shovel when you want it to but will soar with consumate ease should that be what you feel like doing. I've not pushed it at all yet. There's a whole lot of aileron deflection as standard which should mean the model will do aero's with ease. Likewise with the elevator. You only need small inputs to get a very satisfactory result.
Flight times.. well.. having charged the first battery (noting it wasn't fully charged).. 9.5mins of flight time saw it charged in 37m04s so there was still plenty left. 6mins with a warbird has the same battery charged in the 50-55min mark. The second, newer and fully charged battery charged in 36m36s for 15.5mins of flight time so there again.. a good safety margin
One can only imagine how long one would stay up in the right conditions.
All in all.. I'm more than impressed and can't wait to take it out again
ATB
DaveB


 I suffer from paranoid amnesia. I can't remember who I don't trust.